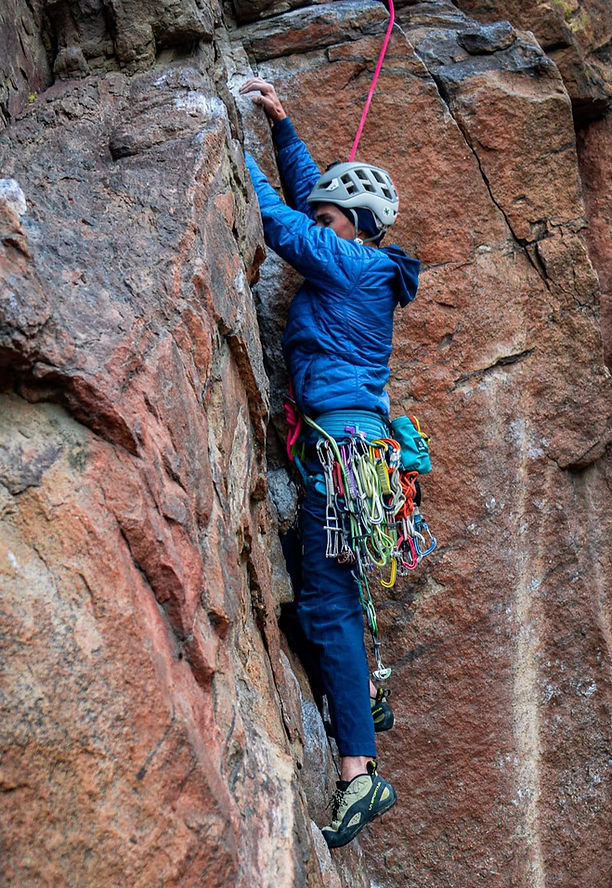
That’s a lot of gear!
Traditional or “Trad” climbing involves placing your own protection as you climb. Instead of clipping bolts, you are looking for natural features, cracks, or constrictions to place traditional climbing equipment like nuts and cams. This is a pretty gear-intensive endeavor, and some of what you carry comes down to personal choice. Once you are comfortable placing gear on lead, you can explore new terrain and enjoy the adventures that come with it.
In this article, we’ll cover some of the gear you’ll need for trad climbing and some of our tips for selecting the right equipment.
Since you will be carrying an additional 10-15 lbs on your harness, you want it to be very comfortable and durable. Lightweight harnesses are great for high-end onsight and redpoint attempts, but they aren’t going to hold a double rack of gear on your hips comfortably for long periods of time.
We’d recommend something like the Petzl AQUILA or the Elderid Orion that has a large, wide waistbelt that distributes the load evenly across your hips. Some harnesses, like the Black Diamond Big Gun, have additional gear loops to help organize your gear. With some creative gear racking, a harness with 4 gear loops will do just fine.
Helmets! Wear them! Especially if you are going to be trad climbing in adventurous, lesser-traveled areas, there may be loose rock. We want to avoid knocking blocks loose onto climbers below us. And if you do have a fall where gear gets pulled, you might be in for a ride. So wear yer helmet! We recommend a lightweight but durable helmet like the Petzel Meteor. Since you are wearing it for extended periods of time, you want it to be light. And you might be banging it around, so a 100% foam helmet without a plastic puck or shell might not be the right choice for countless trad pitches.
Shoes are an incredibly personal choice, but we recommend choosing the right shoe for the terrain. Consider that you will also have 10-15lbs of gear on your harness. A stiffer shoe will provide more support for the additional weight on your feet, so something like a La Sportiva TC Pro is a fantastic all-around trad climbing shoe. You might want to avoid a soft flexible slipper like the Evolv Addict because it will not provide as much support as a stiff shoe and fatigues your feet more quickly. But don’t get me wrong, this could be the right shoe for the job depending on the climb. Generally, stiffer shoes provide better support for long days pitching it out.
For trad climbing, one might prefer a lighter, skinnier rope. Since we are carrying so much gear around, having a high-end lightweight rope like the 9.0 Diameter Mammut Crag Sender or Petzl Volta Guide will help make things easier.

Pick the right tool for the job!
Since we won’t be top roping on it all day, a thick durable 10-11mm rope won’t be necessary. Choose something in the 8.7 – 9.5 range for the right balance of performance and durability. This diameter of rope handles nicely as well, which helps inspire some confidence. Take good care of your ropes with routine washing and proper storage.
The length of rope you chose depends on the region you are climbing in, and the specific climb you have selected. So read ahead for recommendations on rope length, and make sure you have enough rope to make it to each rappel station. A 60-meter rope will get you about anywhere. A 50-meter rope would help save some weight if you knew your climb was a walk-off, and you saw no possible reason for making a rappel, like bailing due to bad weather or getting shut down due to the route’s difficulty.
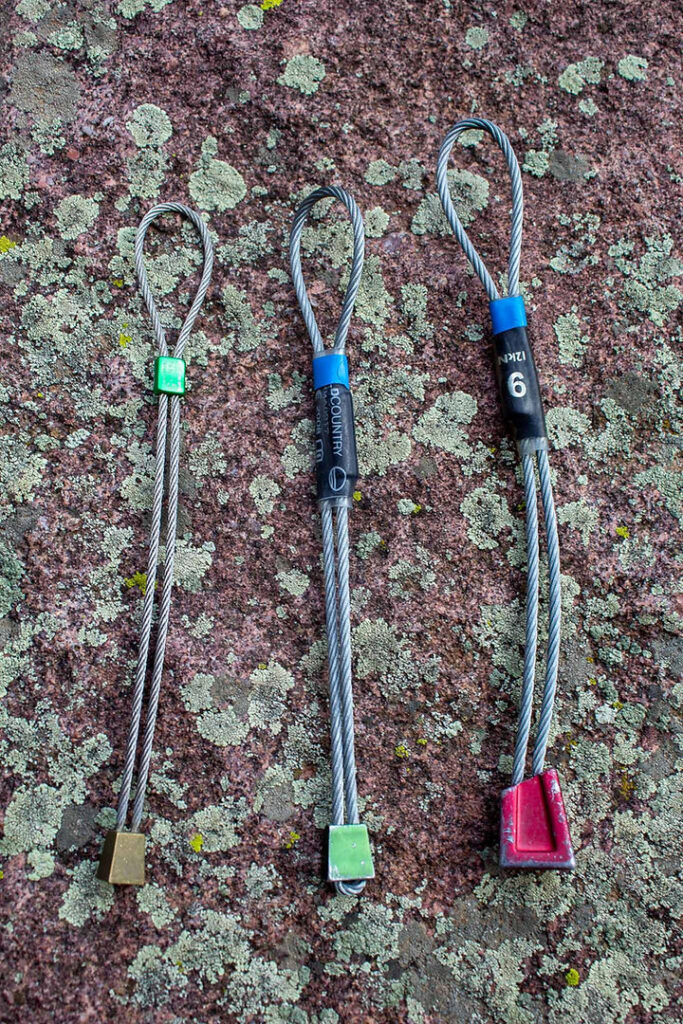
Brass nut (L), Standard nut (M), Offset nut (R)
This is what you probably came here to read about. Unfortunately, there is no one perfect trad rack to take with you every time. What is important is to get to know your climbing area through trial and error, getting beta through other climbers, and then choosing gear appropriately.
Traditional gear is placed in finger to fist size cracks and constrictions that form naturally on featured rock. Cams contract and expand to fill parallel cracks and spaces in the stone. Nuts are placed into natural constrictions where wider spaces become small, allowing the nut to seat into the wall. So, if you are climbing a parallel crack in Indian Creek, you might want 4, #2 size cams on your harness. If you are climbing in Eldorado Canyon, you might want to bring some extra micro cams and small brass nuts.
A standard single rack of cams is usually #.3 to 3, but this can be adjusted on the climbing area you are in or your personal preference. While many cam designs are available, Black Diamond cams have become the standard due to their availability and affordability.
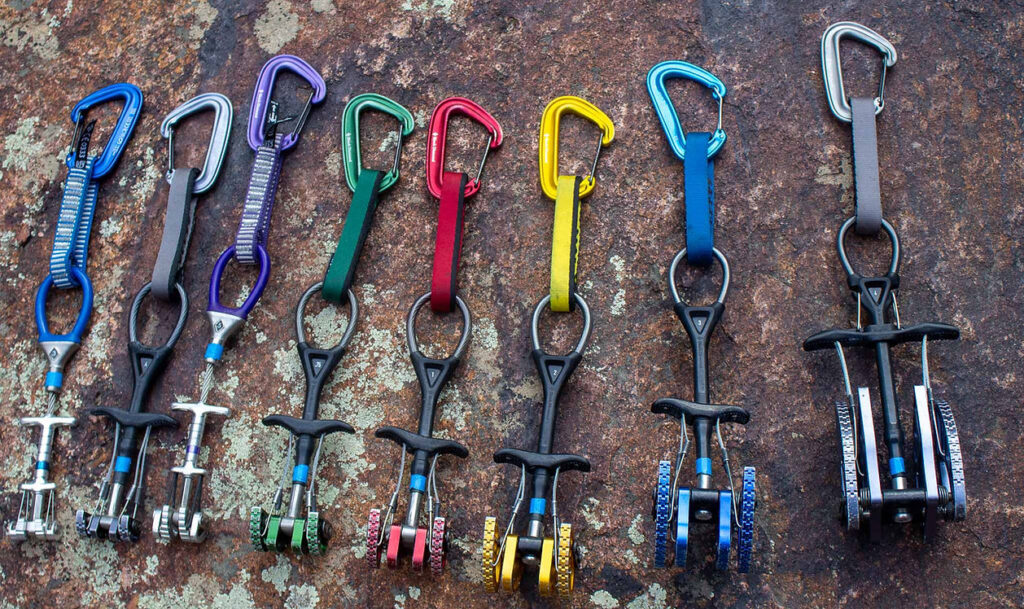
A “Single Rack” of Black Diamond Cams Size .3 to 4, Left to Right
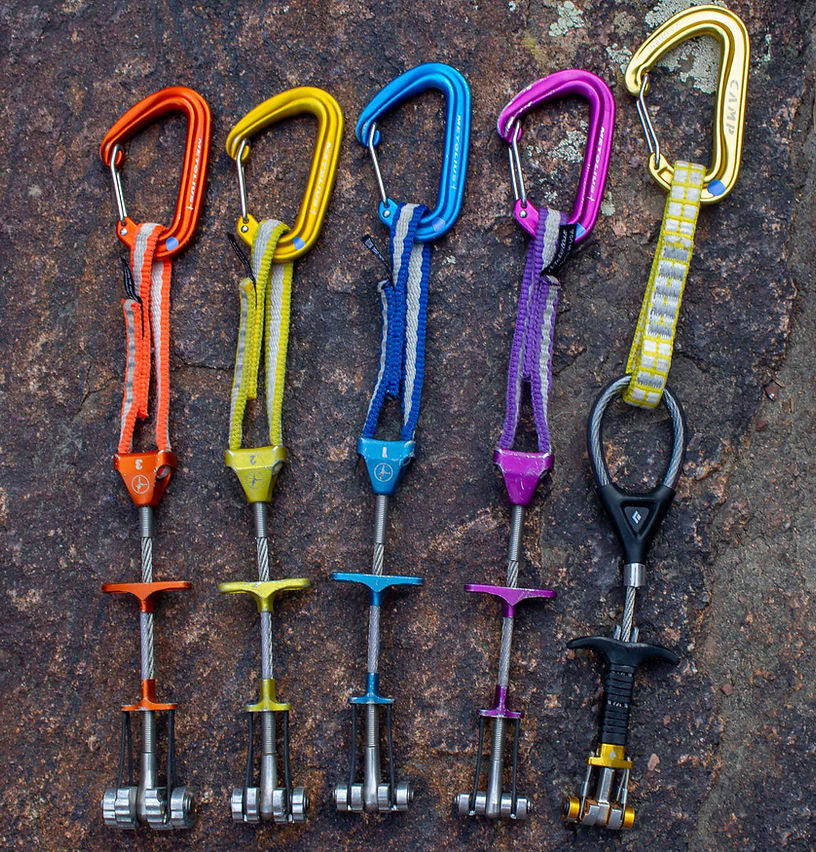
4 Metolius Ultralight Mastercams (L), and a Black Diamond z4 (R)
A subset of camming devices are micro cams, which come in very handy when climbing in varied terrain. Sometimes, there are not nice big even cracks available to take large cams. The trade-off with placing these cams is that they are not as strong, usually rated below the usual 14kn that a standard-sized cam is. Adding micros to your rack is a great way to increase the number of placements you can make while keeping the weight down. 3 micro cams might weigh the same as a single #3.
If I were headed into unknown terrain, with no beta on what might be required for the climb, I would rack “doubles”, a few micros, and my set of nuts. I like to have options when I don’t know what’s ahead, even if that means carrying a little extra weight. “Doubles” means have 2 cams in each size, from #.3 to #3. If I can see wide cracks ahead, then I might also rack a #4. I like to bring a variety of nuts, and if I had to only bring a few, I take DMM offset nuts. These provide more placement options and hold really well even in flaring cracks.
As you evolve, or as your climbing areas require, you can check out tri-cams, ballnuts, big-bros, and cams from other climbing companies, like Totem.
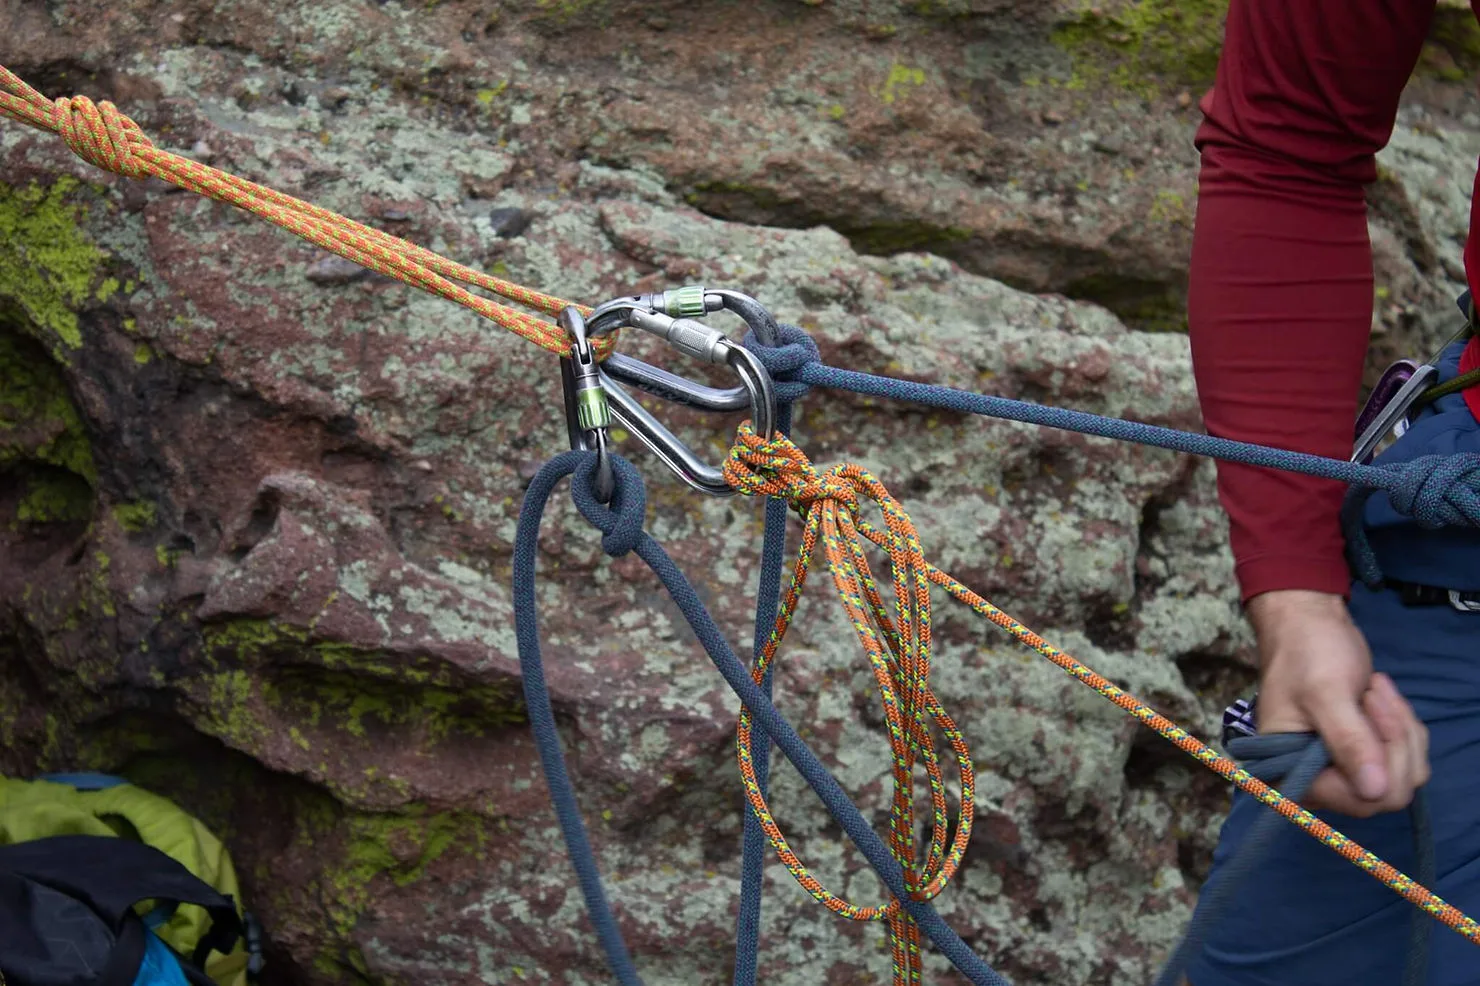
As you climb, you will find that certain pieces need to be extended. If you are a sport climber, you are used to clipping quickdraws onto bolts in a nice even line. In trad climbing, the gear you place seldom lines up nice and evenly, so we find that we need to place 60cm slings on our pieces to extend them. This makes the traversing line between each placement straighter, reducing rope drag and keeping your placements from “walking” or shifting positions. One consideration here is ground fall potential – only extend pieces that need to be extended! If you are climbing a straight, splitter crack, don’t waste your energy and get pumped trying to extend every single piece.
I prefer to have a few sling options available. So I might carry 3-8 60cm slings, 1-2 120cm slings, and a few quick draws for extending my pieces. Ultralight Dyneema slings and draws are really nice to have for this purpose.
For building traditional anchors, having slings or cord available is a must. Sure you can get fancy with the rope work, but using slings has become standard. Rack a 180cm sling, or even a 240cm one for building your anchors. An equal length of cordelette can be used as well. If you were to custom cut a length of cord for anchor building, shoot for 16-22ft depending on your preferences. Cord is versatile in that it can be untied and treaded through natural features, but it is a little heavier.
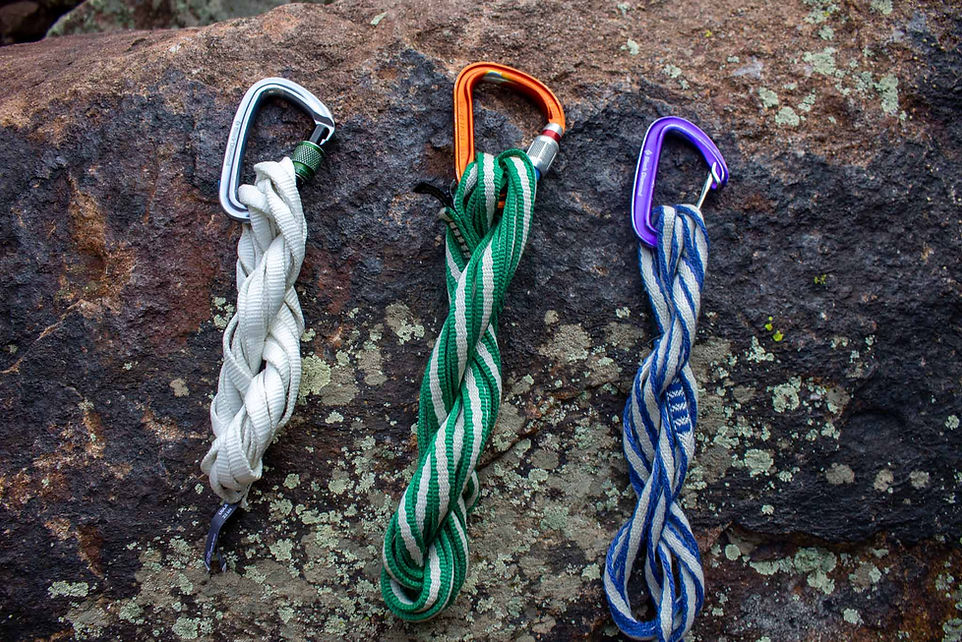
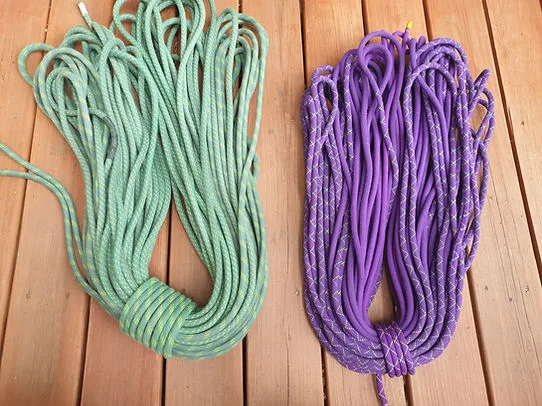
180cm, 240cm, 120cm dyneema slings
Here’s an example list of every item you’ll want to take on a multi-pitch trad climb. Add or subtract items based on your needs. One thing to remember is a nut tool! These can help you remove stuck cams, as well.
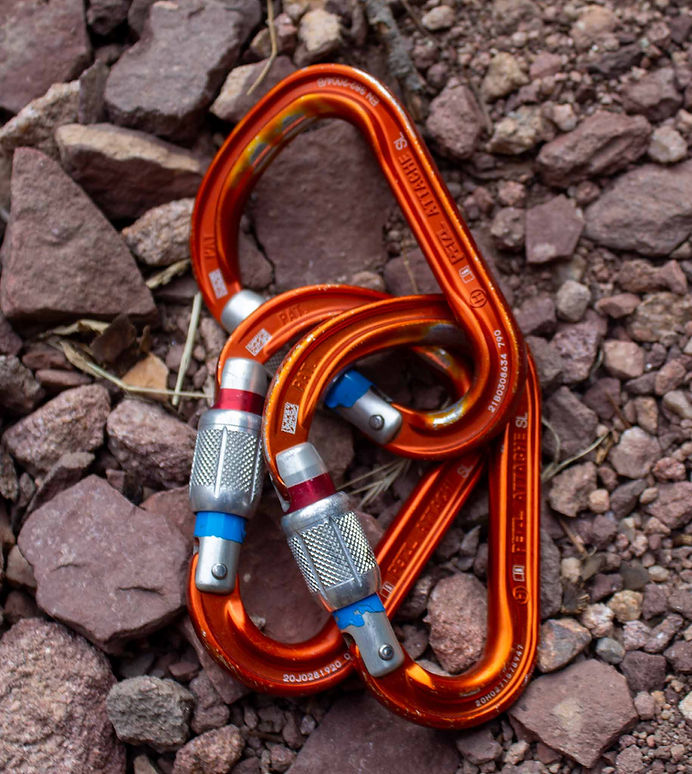
HMS Style Petzl Attache Carabiners

A Nut Tool
As you can tell, this is all a lot of gear! How you rack it all on your harness is important for access and weight distribution. I recommend placing your smaller cams up towards the front of your harness, along with your runners/draws and nuts. Shorter, lighter items belong at the front of your harness.
Place larger, heavier cams on your back 2 gear loops. Put your personal kit on the back left or back right gear loop. Choose the left or right side based on your left/right side dominance and frequency of access. If you are right-handed and are always reaching for your trusty #2, place it on the right side. Place personal kit items that you might only need once, like your tether, at the back left of your harness, for example.
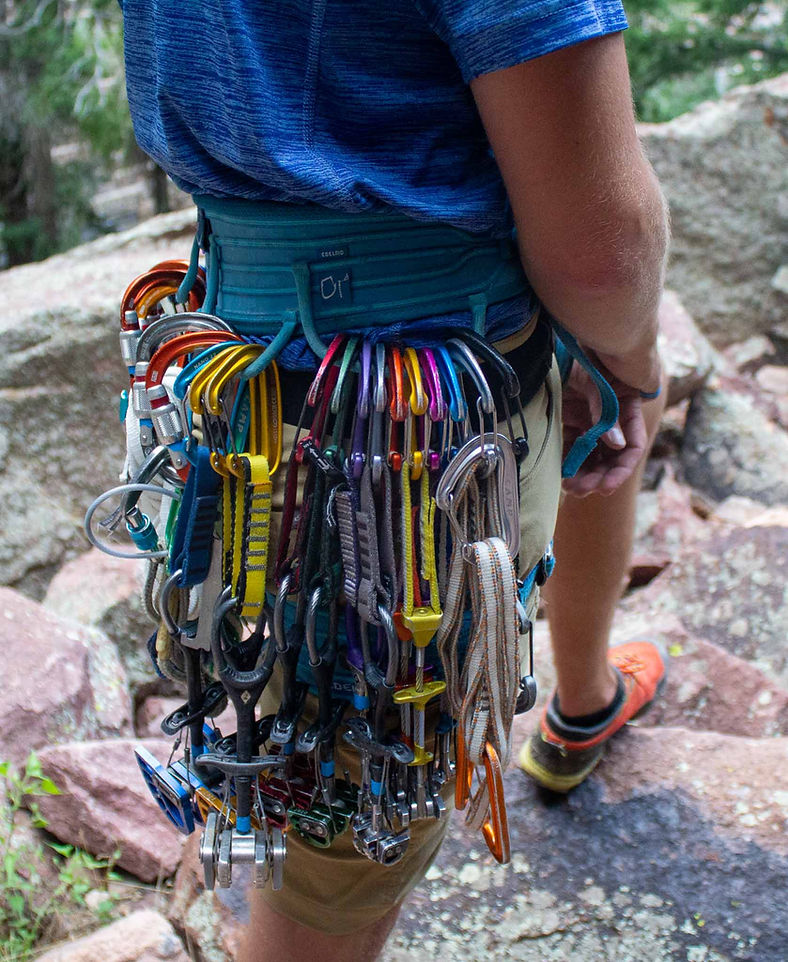
Runners and small cams up front, larger cams and personal kit at the back
If you find that your harness is getting super full and you are struggling for space, try racking cams on top of each other. You can also rack runners and draws in groups of 2/3 to reduce the amount of space they take up on the harness.
If you are climbing easy terrain, say 5.5 and below, where you will always have 2 hands available to place gear, you can rack all your cams on one side, and all your personal kit/ runners on the other. This makes it easy to organize. If you are pushing your grade, keep 1 cam of each size and a few runners on both sides of your harness. If you are getting pumped and can’t switch hands on the rock, you might not be able to get to the gear you need easily.
If you haven’t tried trad climbing yet, book a day with one of our guides! Practice your skills and have them validated before venturing out on your own.


Content Copyright © 2026 of Golden Mountain Guides. All rights reserved. | Privacy Policy | Site Map