How many people think the figure eight is the most valuable knot a climber can know? What about a bowline, clove hitch, or flat overhand?
What about the Bachman, prussik, or alpine butterfly?
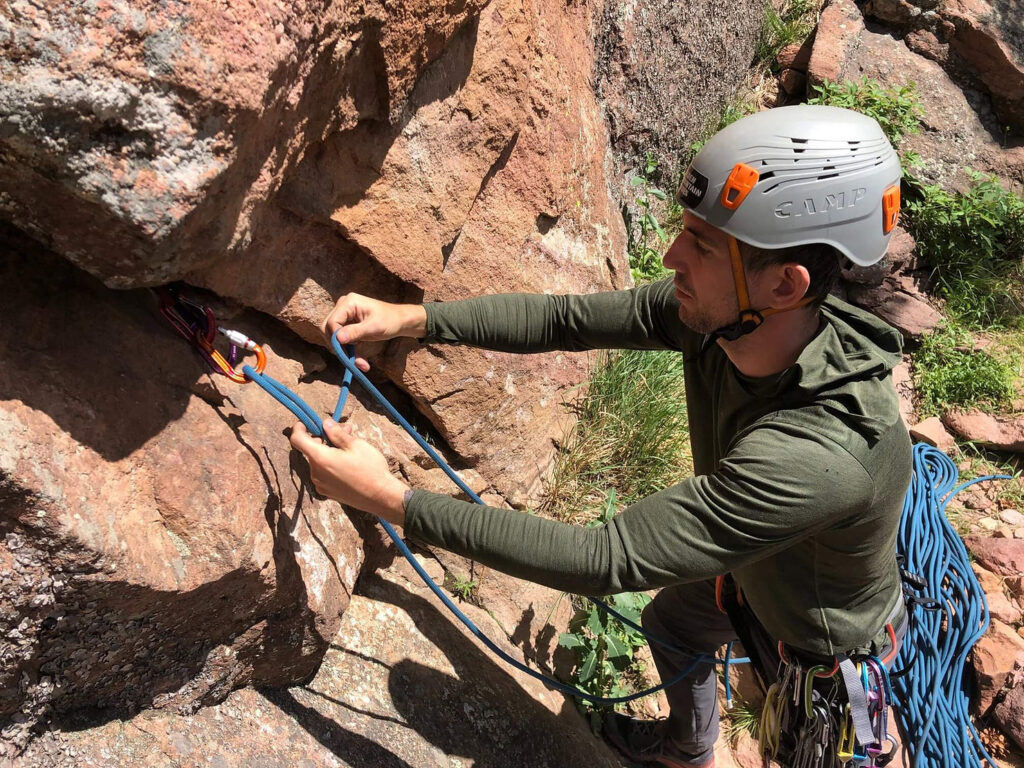
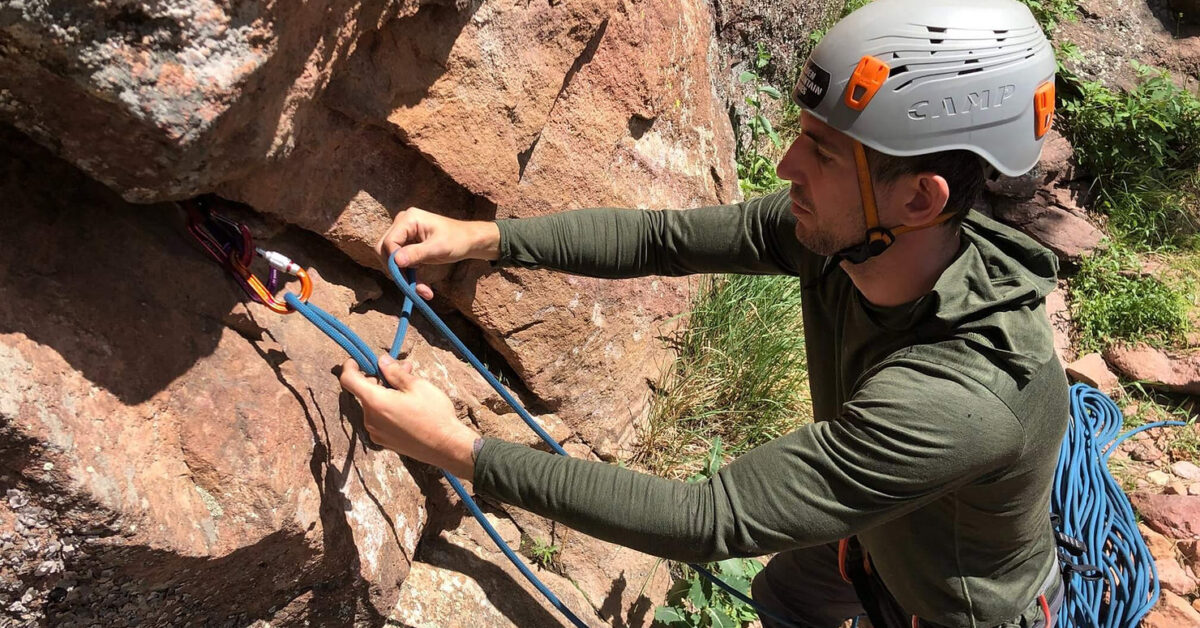
Practice makes perfect, especially when learning to tie knots and hitches!
While these are all great knots and hitches that every climber should know, our vote goes to the munter hitch!
Technically speaking, the munter is not a knot. It’s a hitch. We know, we know: the title is misleading… But that’s splitting hairs!
People always seem to think climbers know a ton of knots, but the reality is that we use a few in a lot of different ways. And the munter hitch is no exception!
Advanced Munter Hitch Applications

Many self rescue scenarios utilize the munter hitch.
The munter hitch, or Italian hitch, is quite versatile and has many uses including belaying, load transfers, and can easily be turned into a clove hitch. Any self rescue that we perform as a climber is based around proficiency with the munter hitch and its subsequent knots, the mule knot and the overhand knot.
This combination of knots and hitches is the foundation for many other technical rope skills like those utilized by Single Pitch Instructors.
The munter hitch is named after Swiss mountain guide Werner Munter. He was born in 1941 in Lohnstorf, Switzerland where he worked as a mountain guide. While he is known for the munter hitch, he is most famous for his contributions to avalanche education and risk assessment of avalanche terrain, which he later documented in many books.
Throughout his time as a mountain guide, he introduced the munter hitch as a friction device for belaying, rappelling, and lowering a climber.
Originally known as the “Mezzo Barcaiolo”, or crossing hitch in Italian, Werner was a strong advocate for it’s use in the mountains. Munter must have been easier to say and the name has since stuck.
Today, many mountain guides use the munter hitch for belaying, lowering, self rescue, and extending anchors. While it’s not as common for recreational climbers to use, it should be a tool in the toolbox for all climbers.
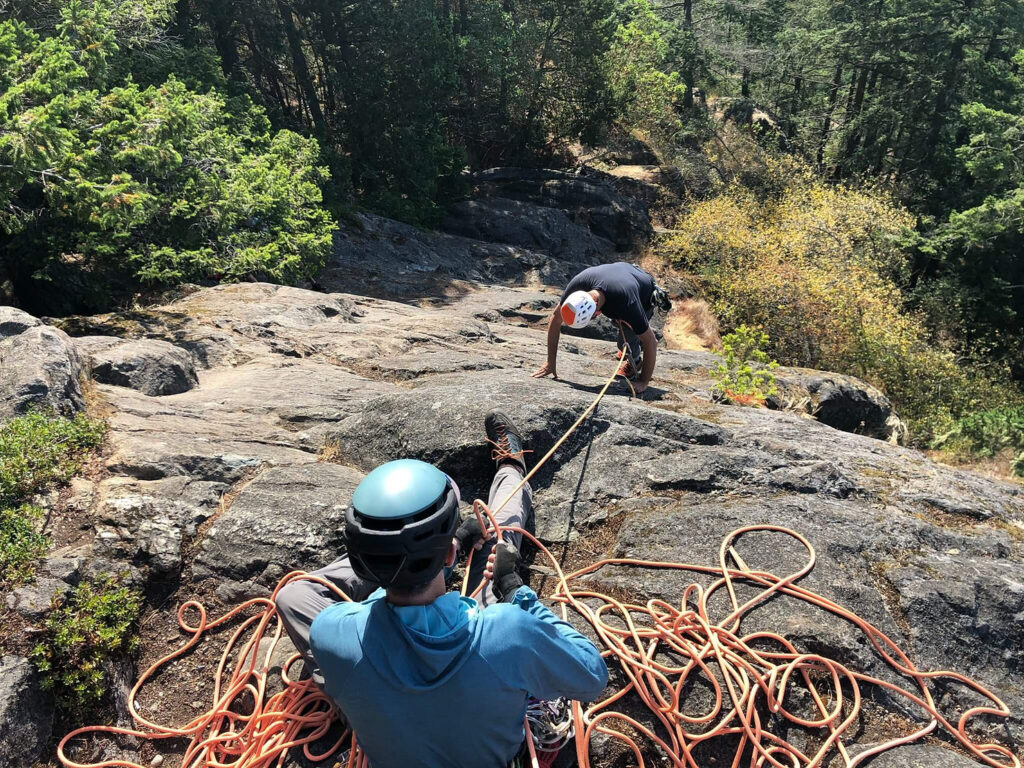
The munter hitch can provide a very fast belay while moving through 3rd and 4th class terrain.
The munter hitch has many uses in the climbing world. It is a belay device and crucial self rescue skill that all climbers venturing outdoors should know.
So what are the benefits of using the munter hitch over a traditional belay device?
So with all these benefits, why don’t more climbers use it?
Well, the answer is simple. Climbers feel the munter hitch twists and kinks the rope.
While it does introduce some small amount of twist in the sheath of the rope (less than cleaning an anchor and lowering through Fixe rap rings), it can be easily mitigated. It all depends on where the brake strand is in relation to the load strand!
You can minimize twists by keeping the brake strand parallel with the load strand. The farther from parallel they are, the more twists you’ll get in your rope!
The Basics
Let’s start off easy. The munter hitch is quite easy to tie. The two most common ways to tie this hitch are the air munter and the one handed munter.
The Air Munter:
When in doubt, tie the air munter!
The One Handed Munter:
The one handed munter takes a little bit more practice.
Now that we’ve got tying the munter dialed, let’s add in a few unique twists and variations.
How to tell the load versus brake strand of a Munter:
Since the munter is multidirectional and can be used for belaying and lowering, it’s crucial to know which strand of rope is the load strand and which is the brake strand.
Here’s an easy way to identify which is which. Find the horseshoe.
When using the munter hitch in lowering mode – whichever strand is coming out through the middle of the horseshoe is going to be the load strand. The opposite strand will of course be the brake strand.
When using the munter hitch in its raising mode – whichever strand is coming out through the middle of the horseshoe is going to be the brake strand. The opposite strand will of course be the load strand.
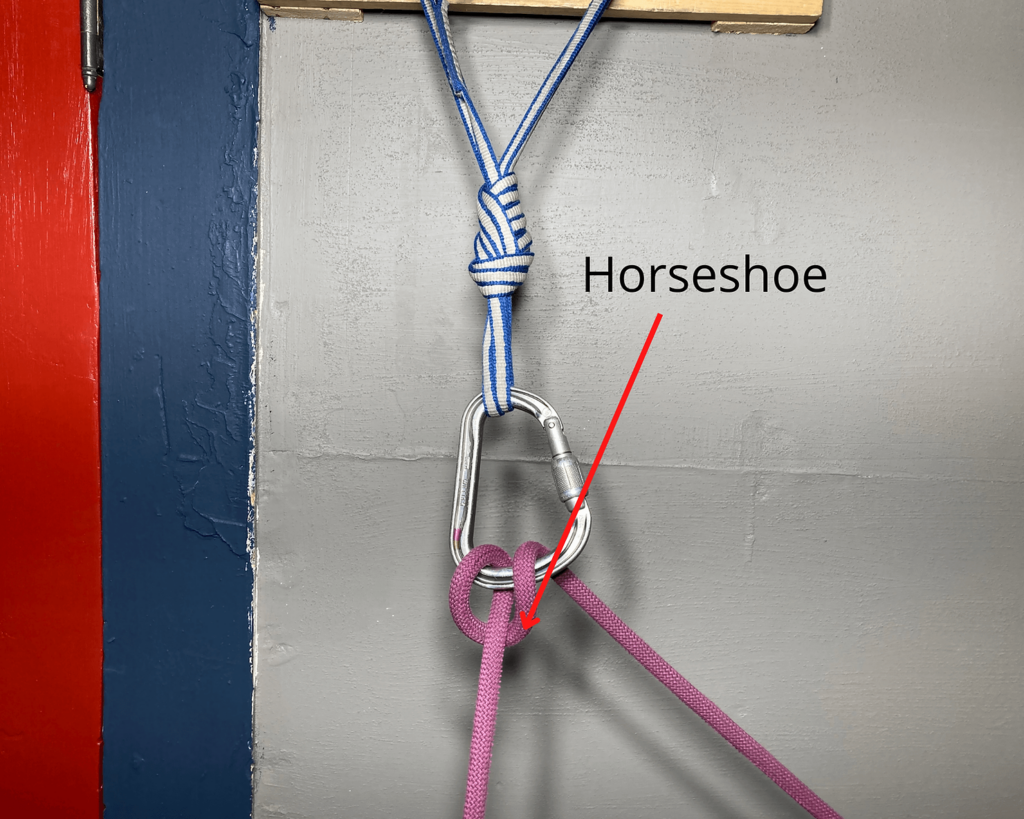
Can you guess which orientation this munter is tied in? If you guessed “lower” then you’re correct!
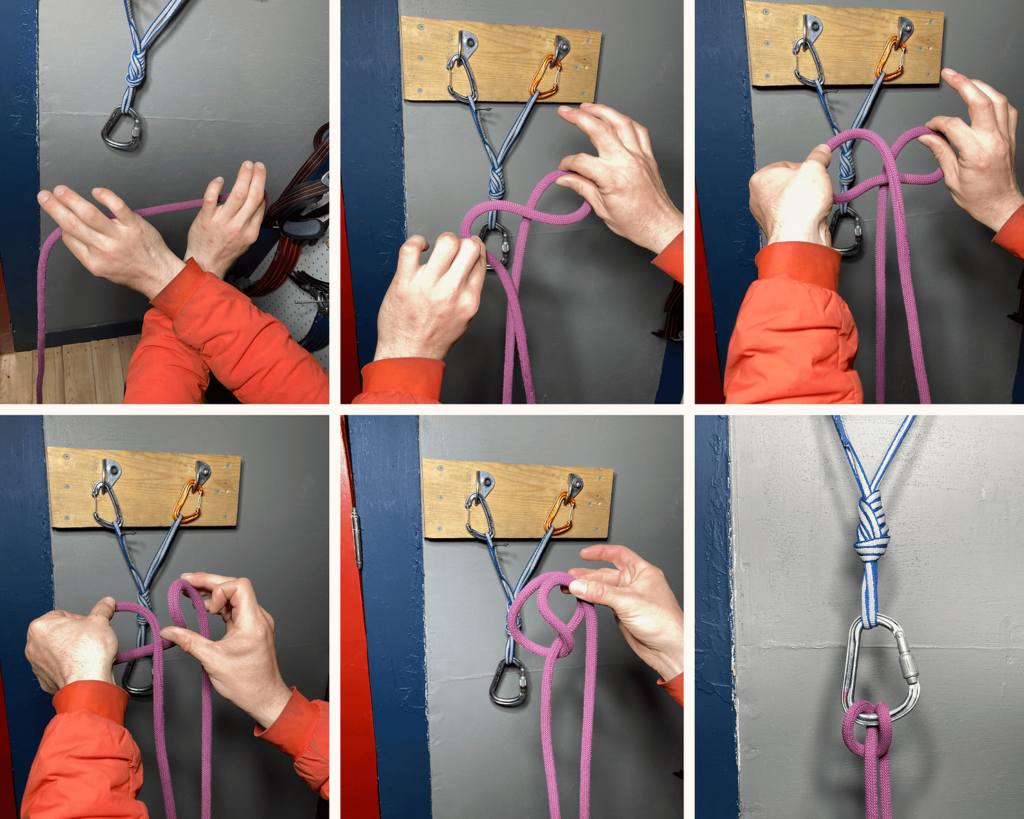
The Munter Mule Overhand:
Commonly referred to as the MMO or baseline, this combination of knots and hitches is where self rescue begins from. This is a great way to go hands free and makes it extremely easy to transition into a raise, lower, or other form of technical descent.
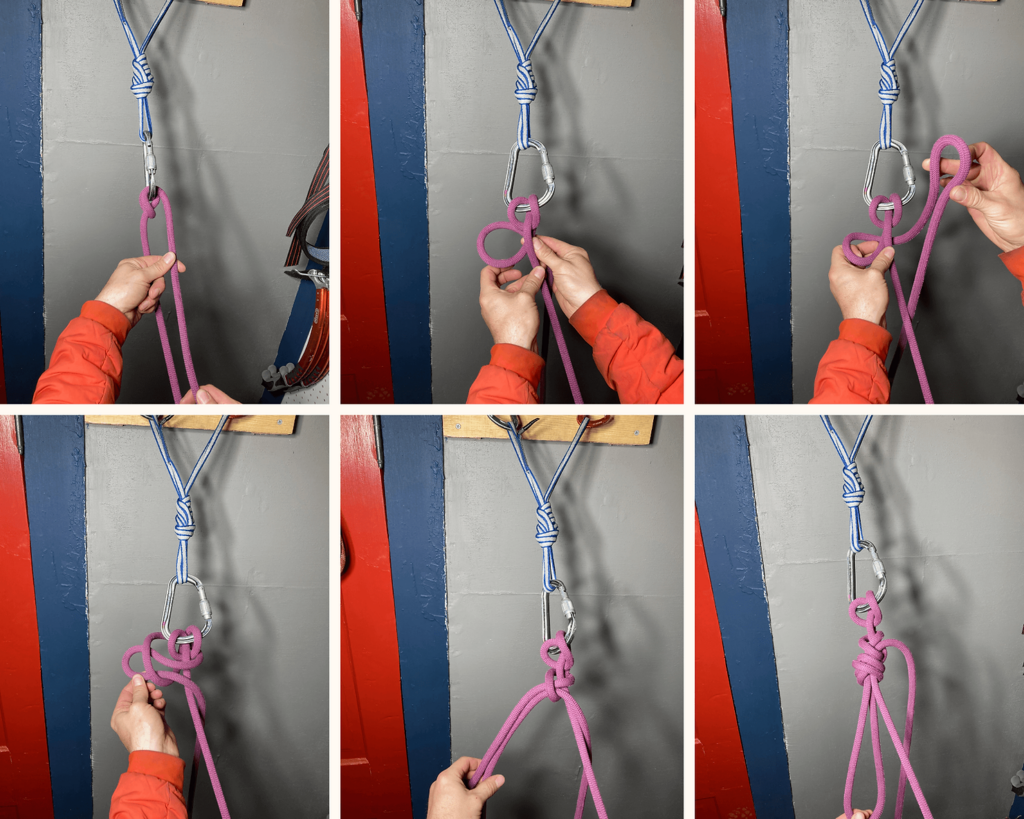
Commonly referred to as the MMO or baseline, the munter mule overhand is where many self rescue scenarios begin from.
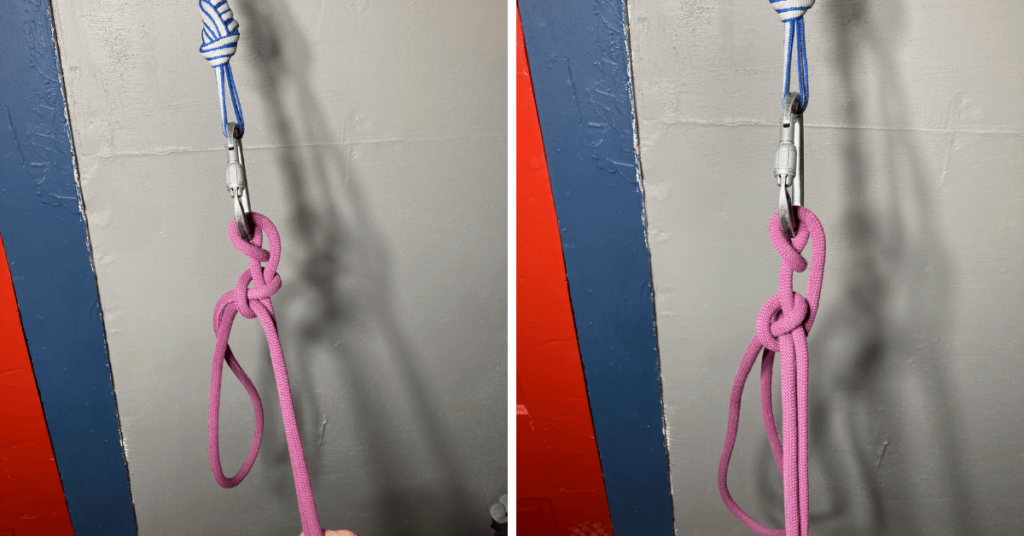
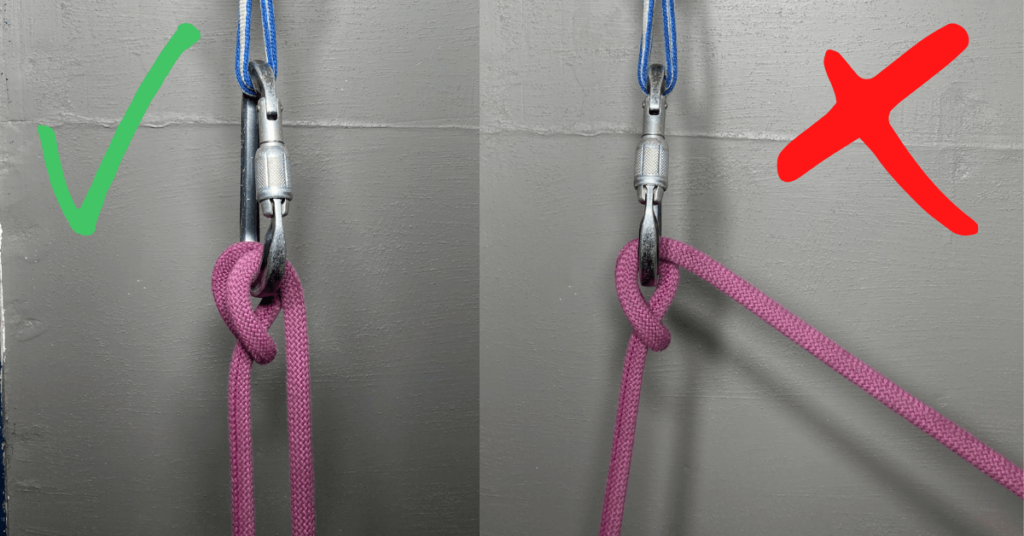
Can you see the difference? The picture on the left shows a mule knot tied correctly. An easy way to double check is that the mule knot captures both the load and brake strand. The picture on the right is a mule knot tied incorrectly.
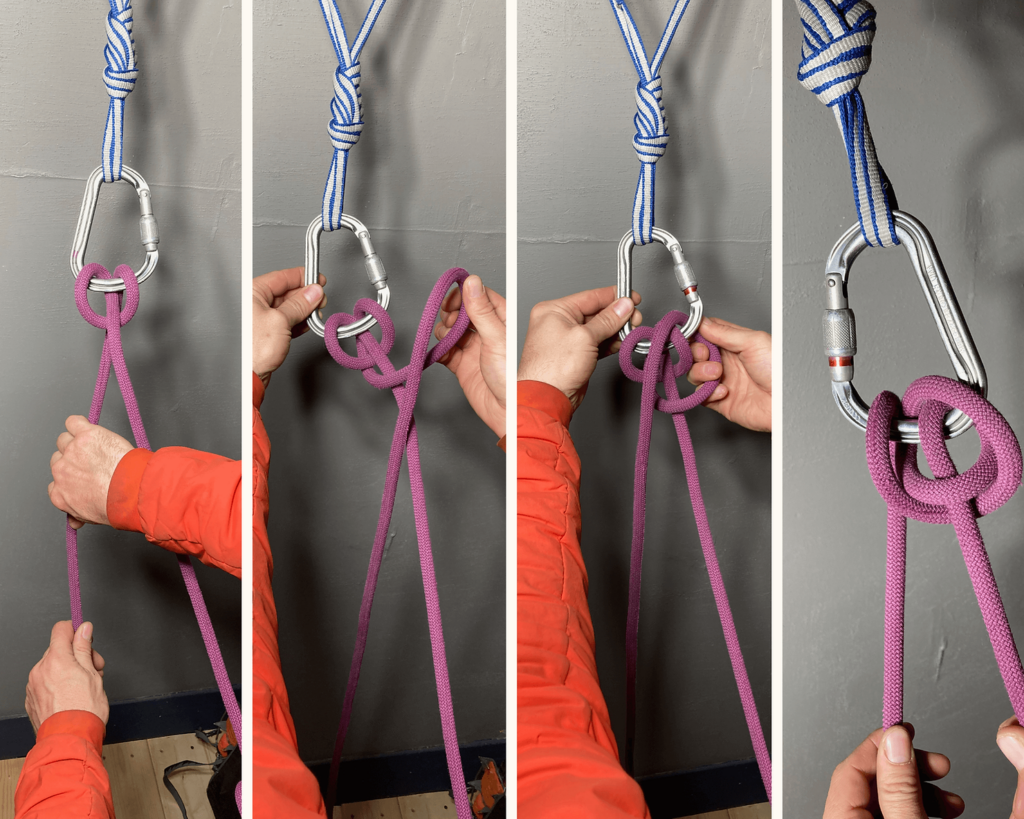
Turning a Munter into a Clove hitch:
Want to belay a follower up to your anchor and secure them without tying the munter mule overhand? Enter the clove hitch!
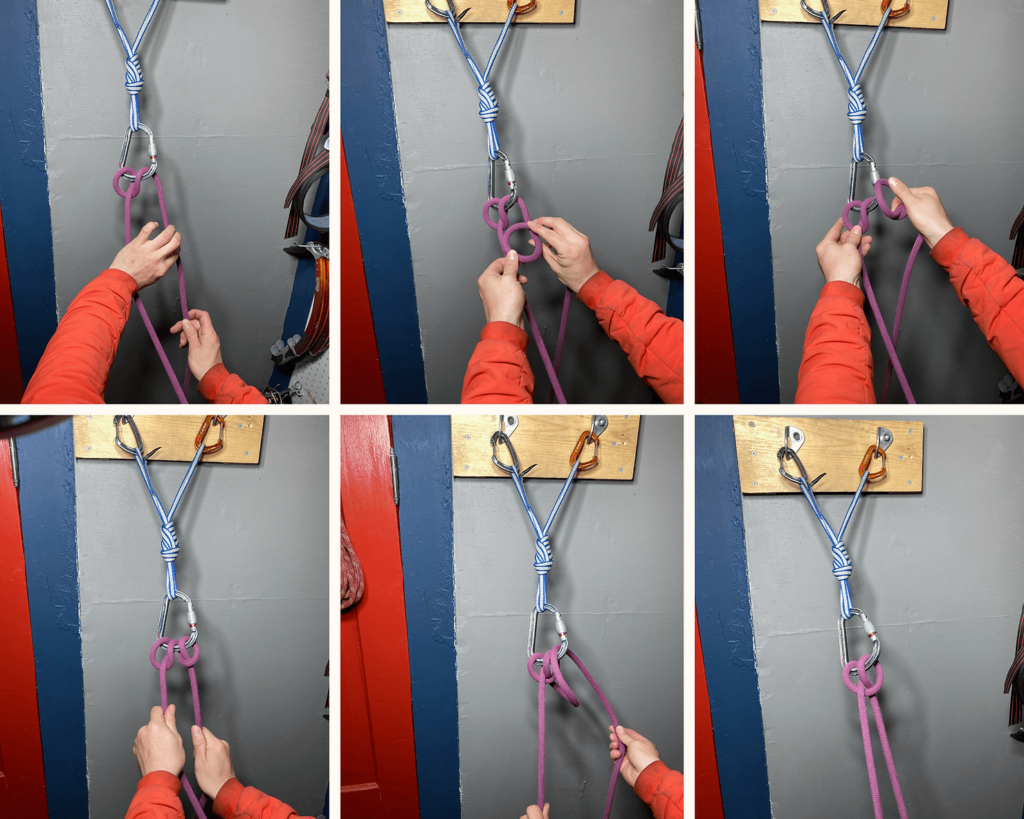
The munter is easy to convert into a clover hitch.
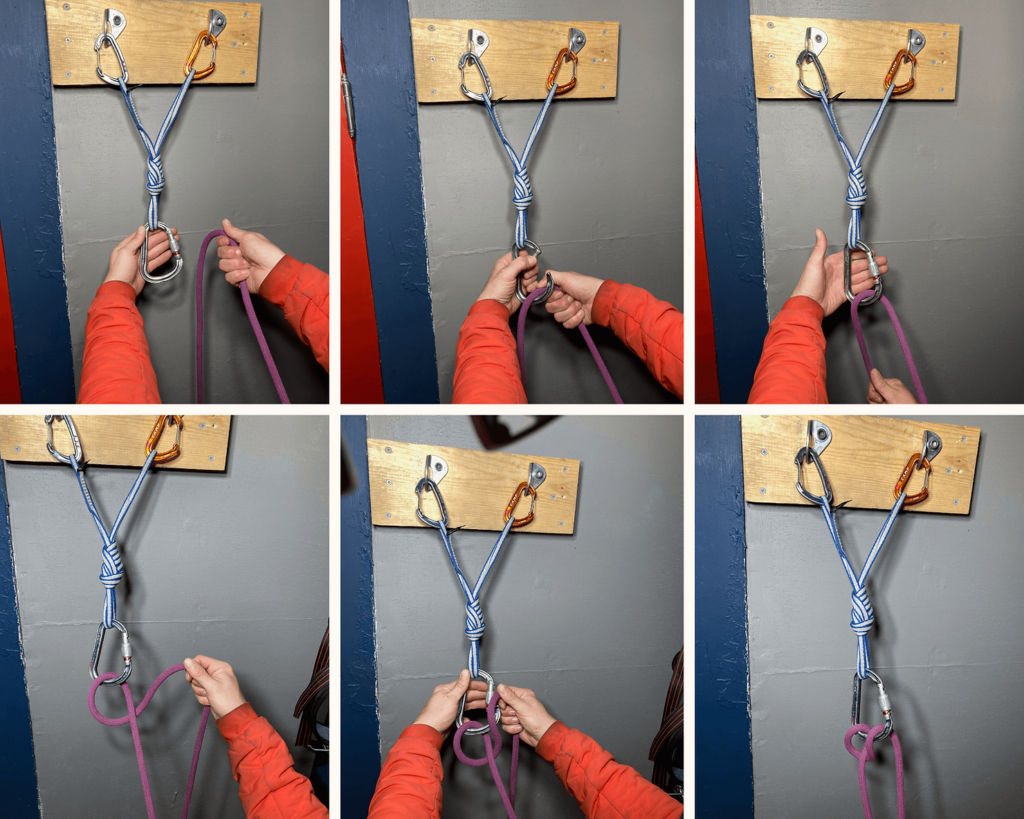
Turning the Munter into a Self Locking Belay Device:
Sometimes it can be really nice to have a little more control of the brake strand while belaying a follower. We typically accomplish this with a plate device or assisted braking device such as a GriGri.
We can create a similar system with the munter hitch. This can give you an opportunity to take pictures, eat and drink, and look at the route topo while actively belaying.
While not the most practical technique for belaying when the chance of falling is high and the second needs to be lowered, this technique is excellent for hauling a pack through a crux pitch as the extra carabiner acts as a progress capture device.
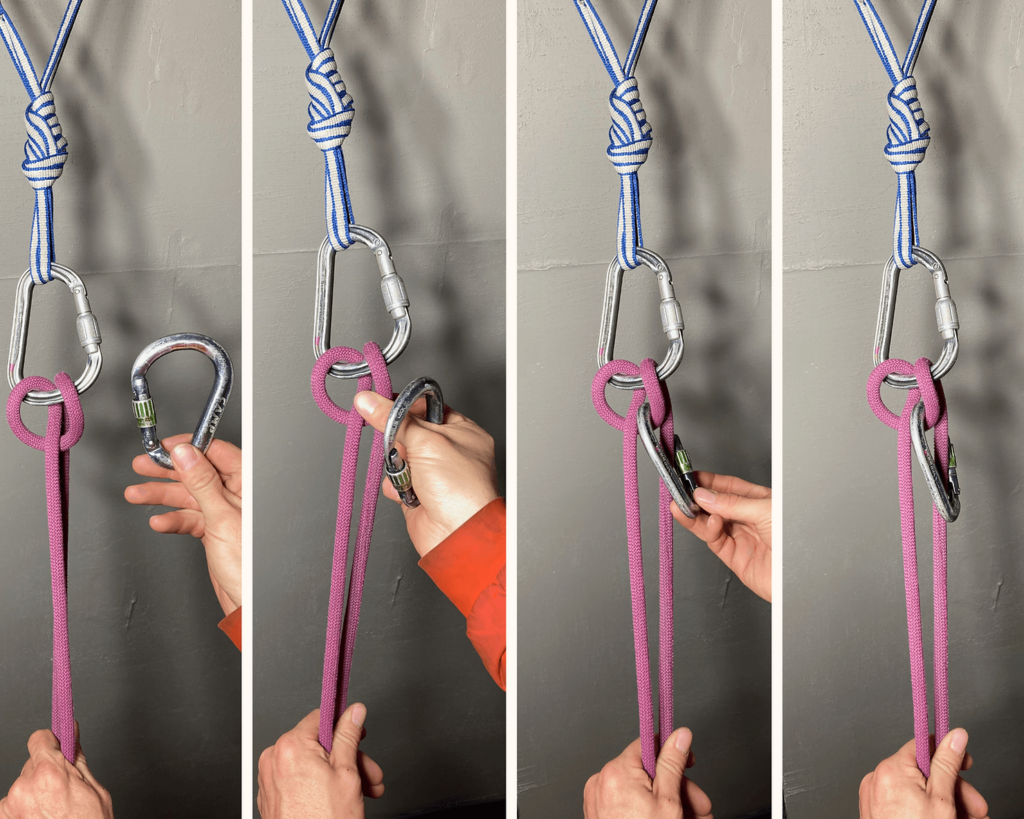
The self locking munter has its brake and load strands flip-flopped.
The Super Munter:
Sometimes it can be really nice to have extra friction. A few examples could be belaying a heavier follower or rappelling on a munter hitch with an injured climber.
The extra friction of the super munter can increase our braking ability and give us more control, especially if we are lowering a lot of weight.
The super munter is a great choice when lowering very heavy load as it gives us an insanely high amount of friction!
Real World Application of the Munter:
Imagine you’ve just topped out a pitch and the belay ledge is sloping and full of loose rocks. There is a good crack for setting gear about 15 feet back on the ledge.
Having the rope run over so much loose rock can definitely be a major safety concern for your follower. We could clove hitch into the anchor and step back to the edge of the sloping ledge, but, we would be unprotected in terrain where the likelihood of falling is high.
You can always extend your anchor and masterpoint using the munter Hitch!
Have we convinced you yet?
No other knot or hitch has so many different and unique attributes and applications within the vertical climbing realm. The munter hitch truly is a workhorse.
It’s all too easy to learn a knot or skill once, and completely forget them when you need them most. Get out and practice with some friends, put your dog on belay with a munter, or spend a day working one on one with a professional guide to ensure you are the best climbing partner you can be!
Remember: No amount of online learning is substitute for hands on experience while working with a professional.


Content Copyright © 2026 of Golden Mountain Guides. All rights reserved. | Privacy Policy | Site Map